I started a new math art project today and just couldn’t stop. Basically I’m dreading going back to school soon, but didn’t want to mope all day and waste it. So the day turned into a day of learning new things.
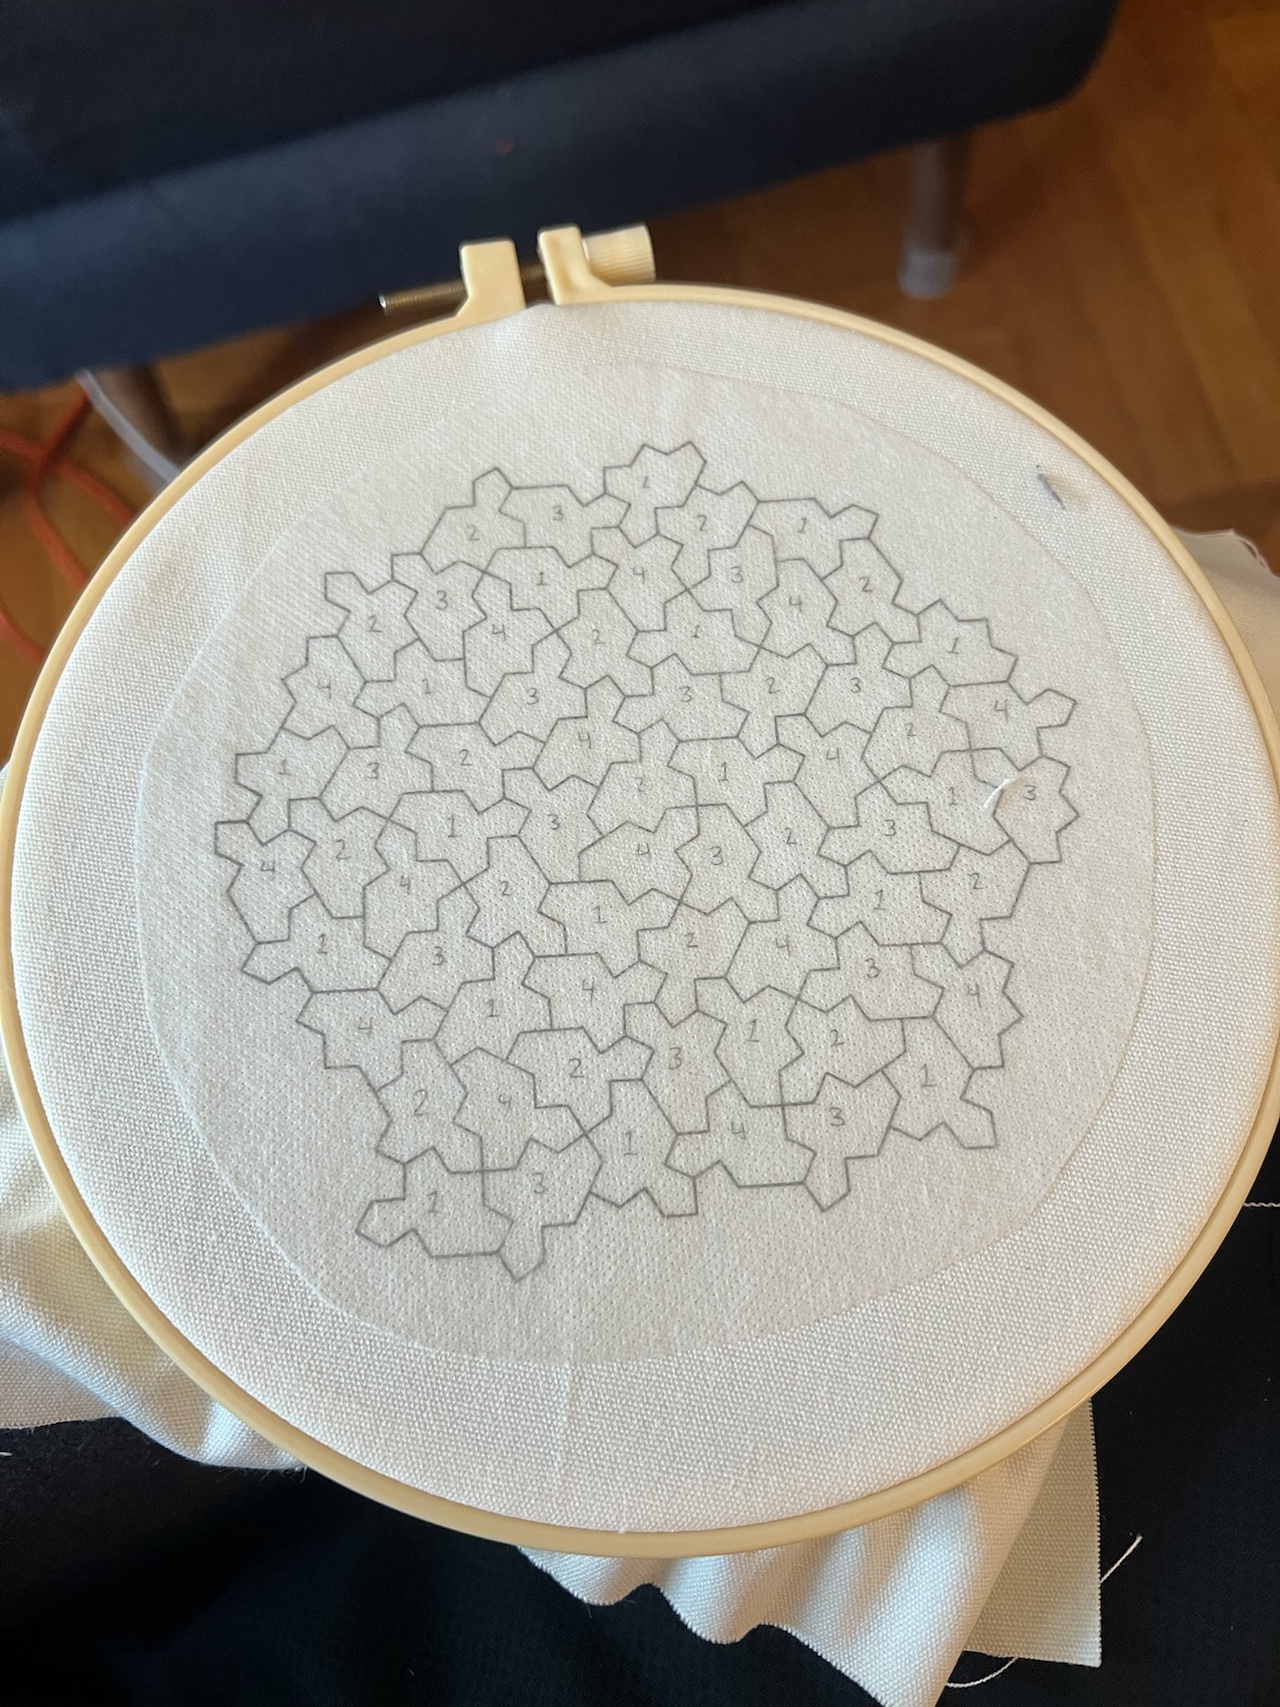
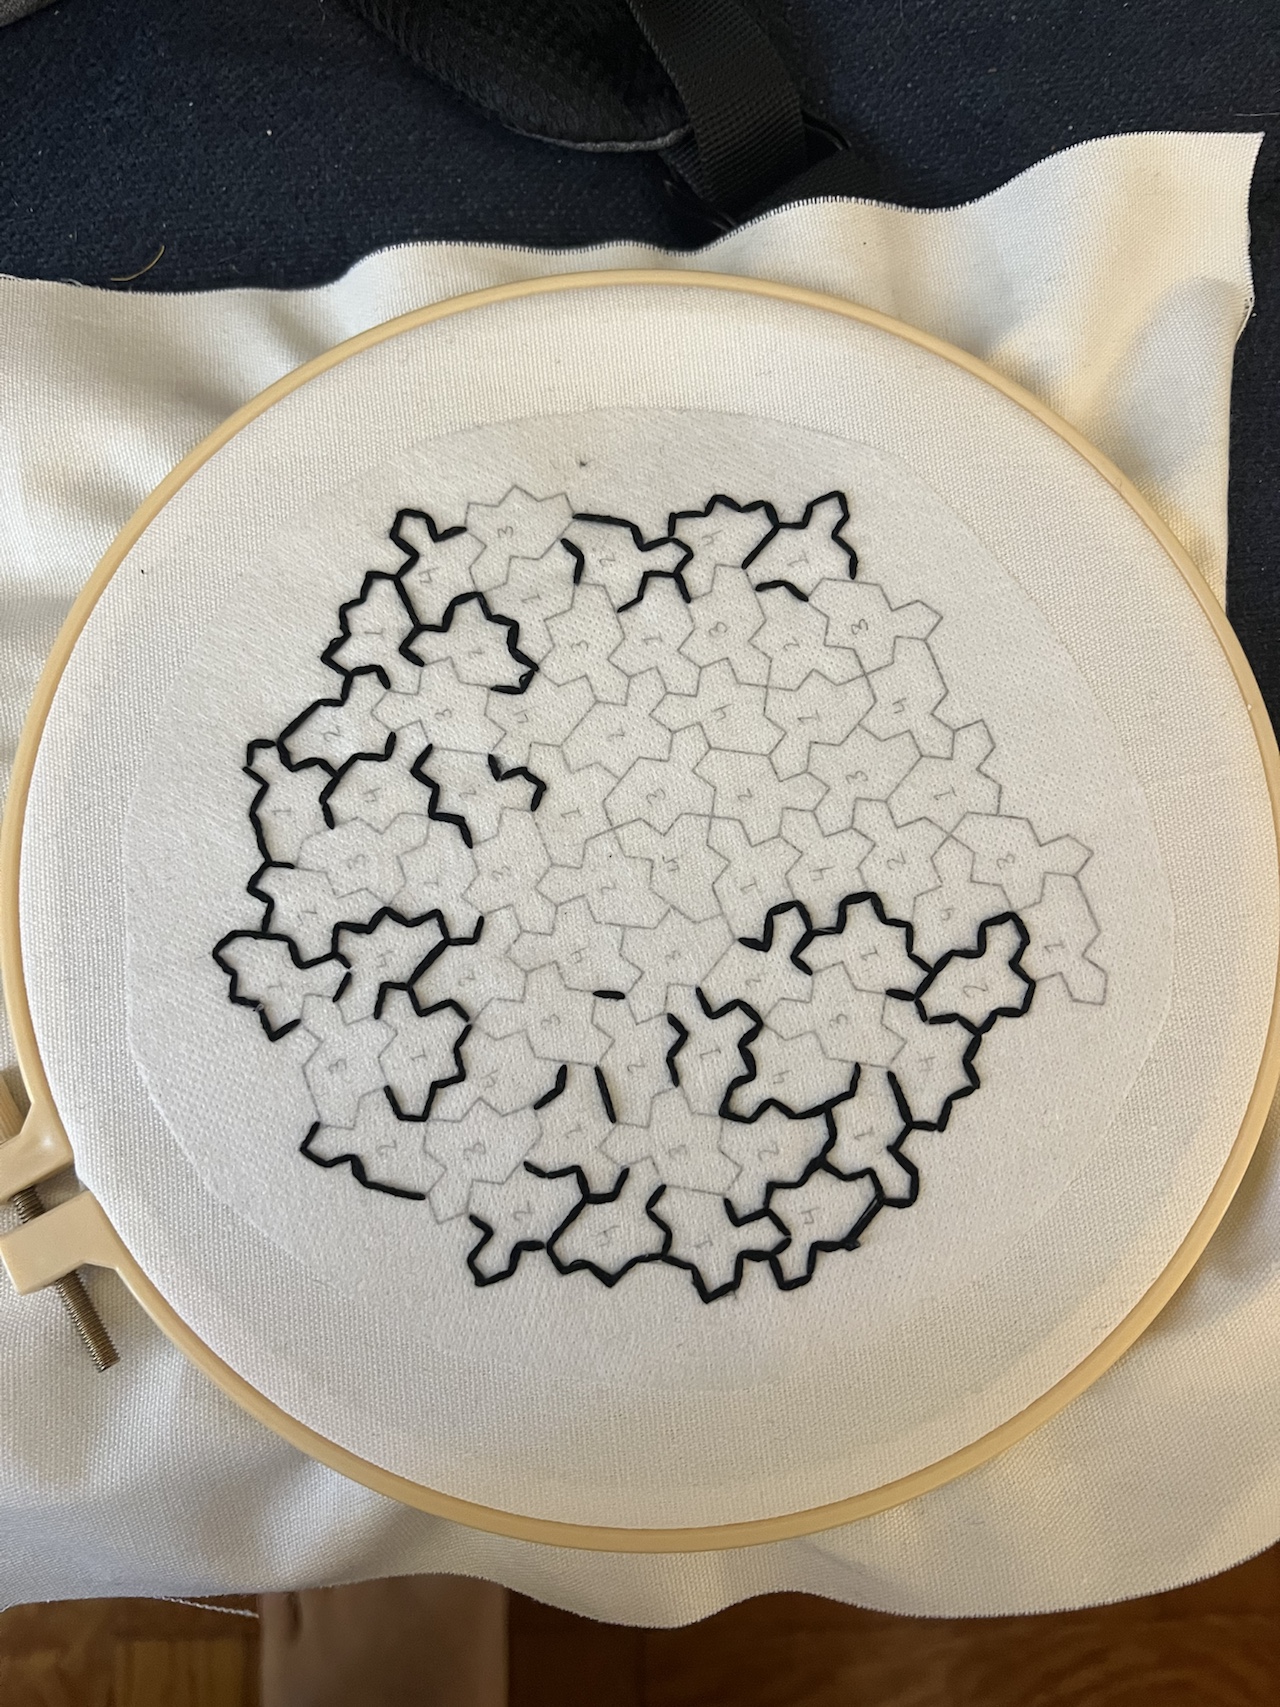
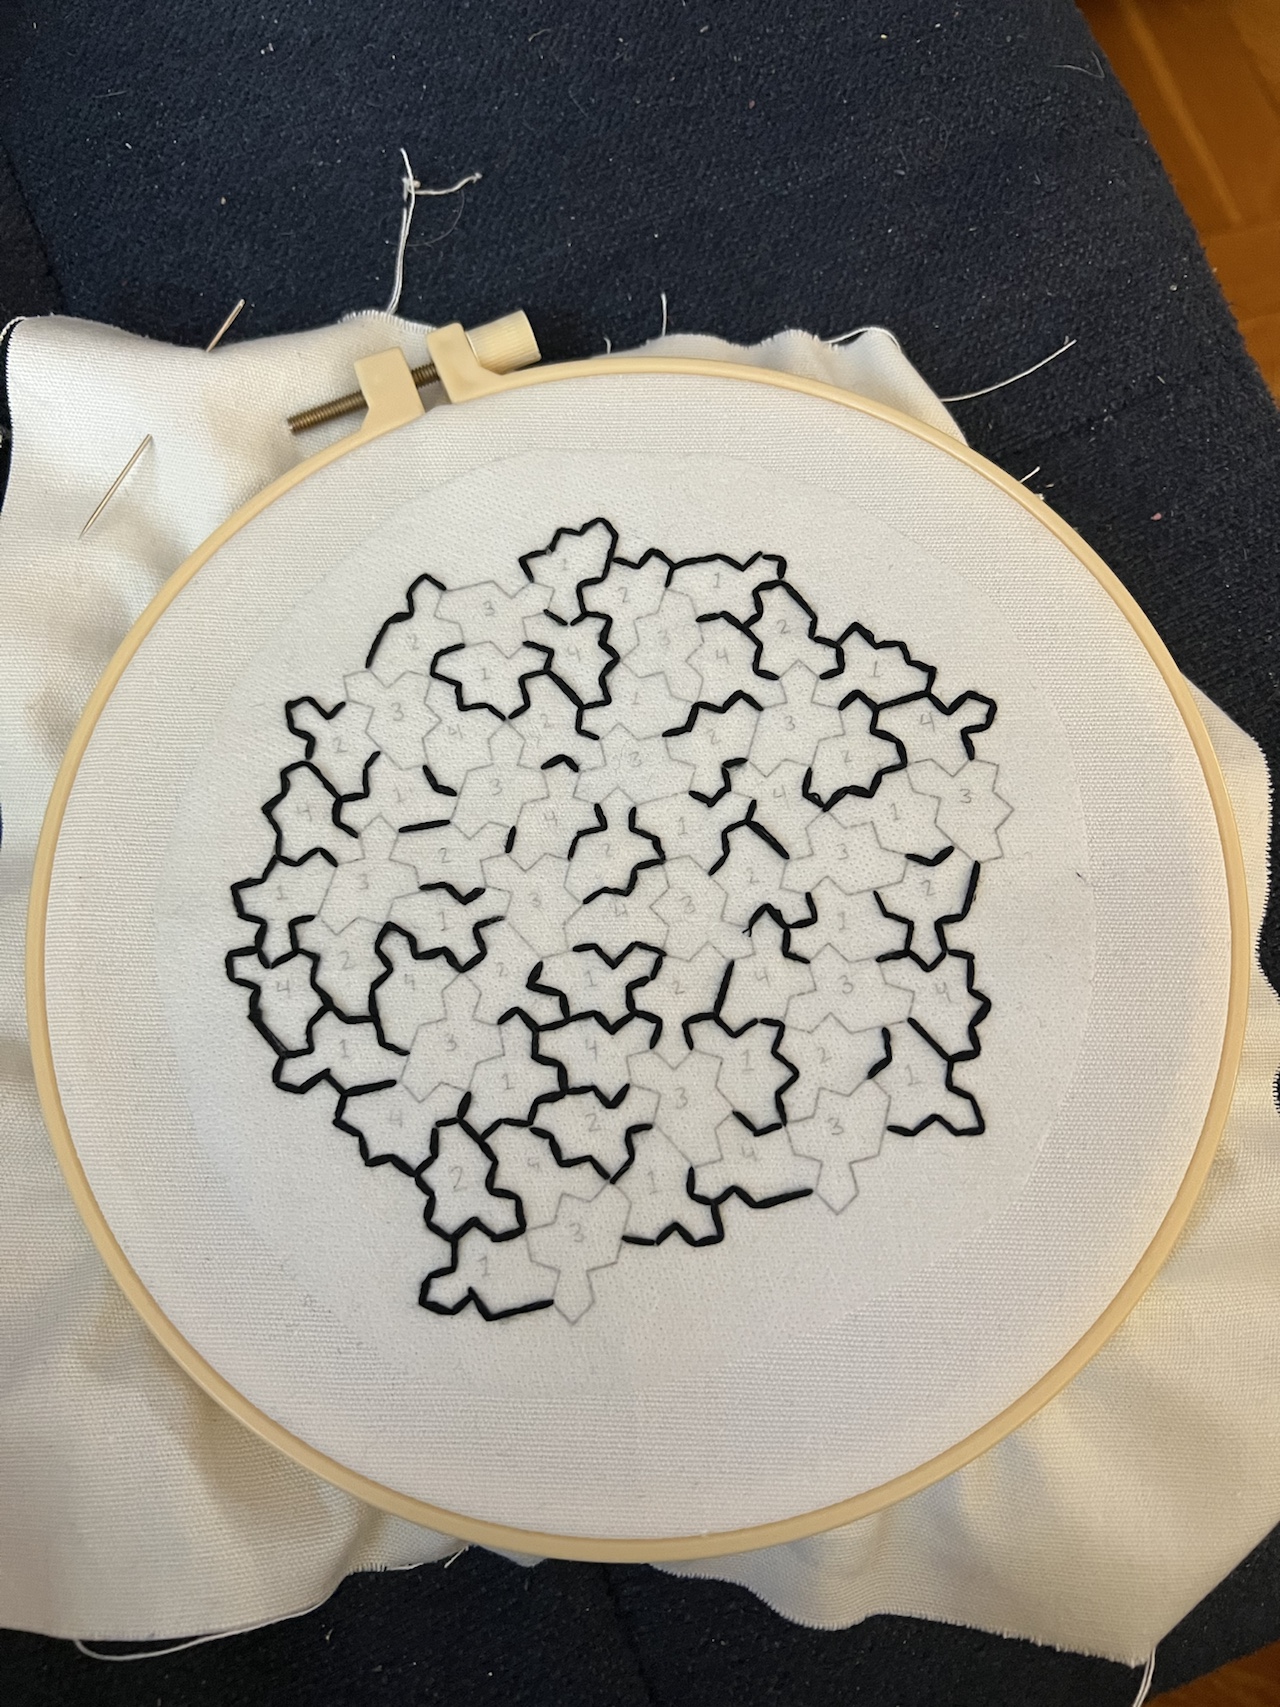
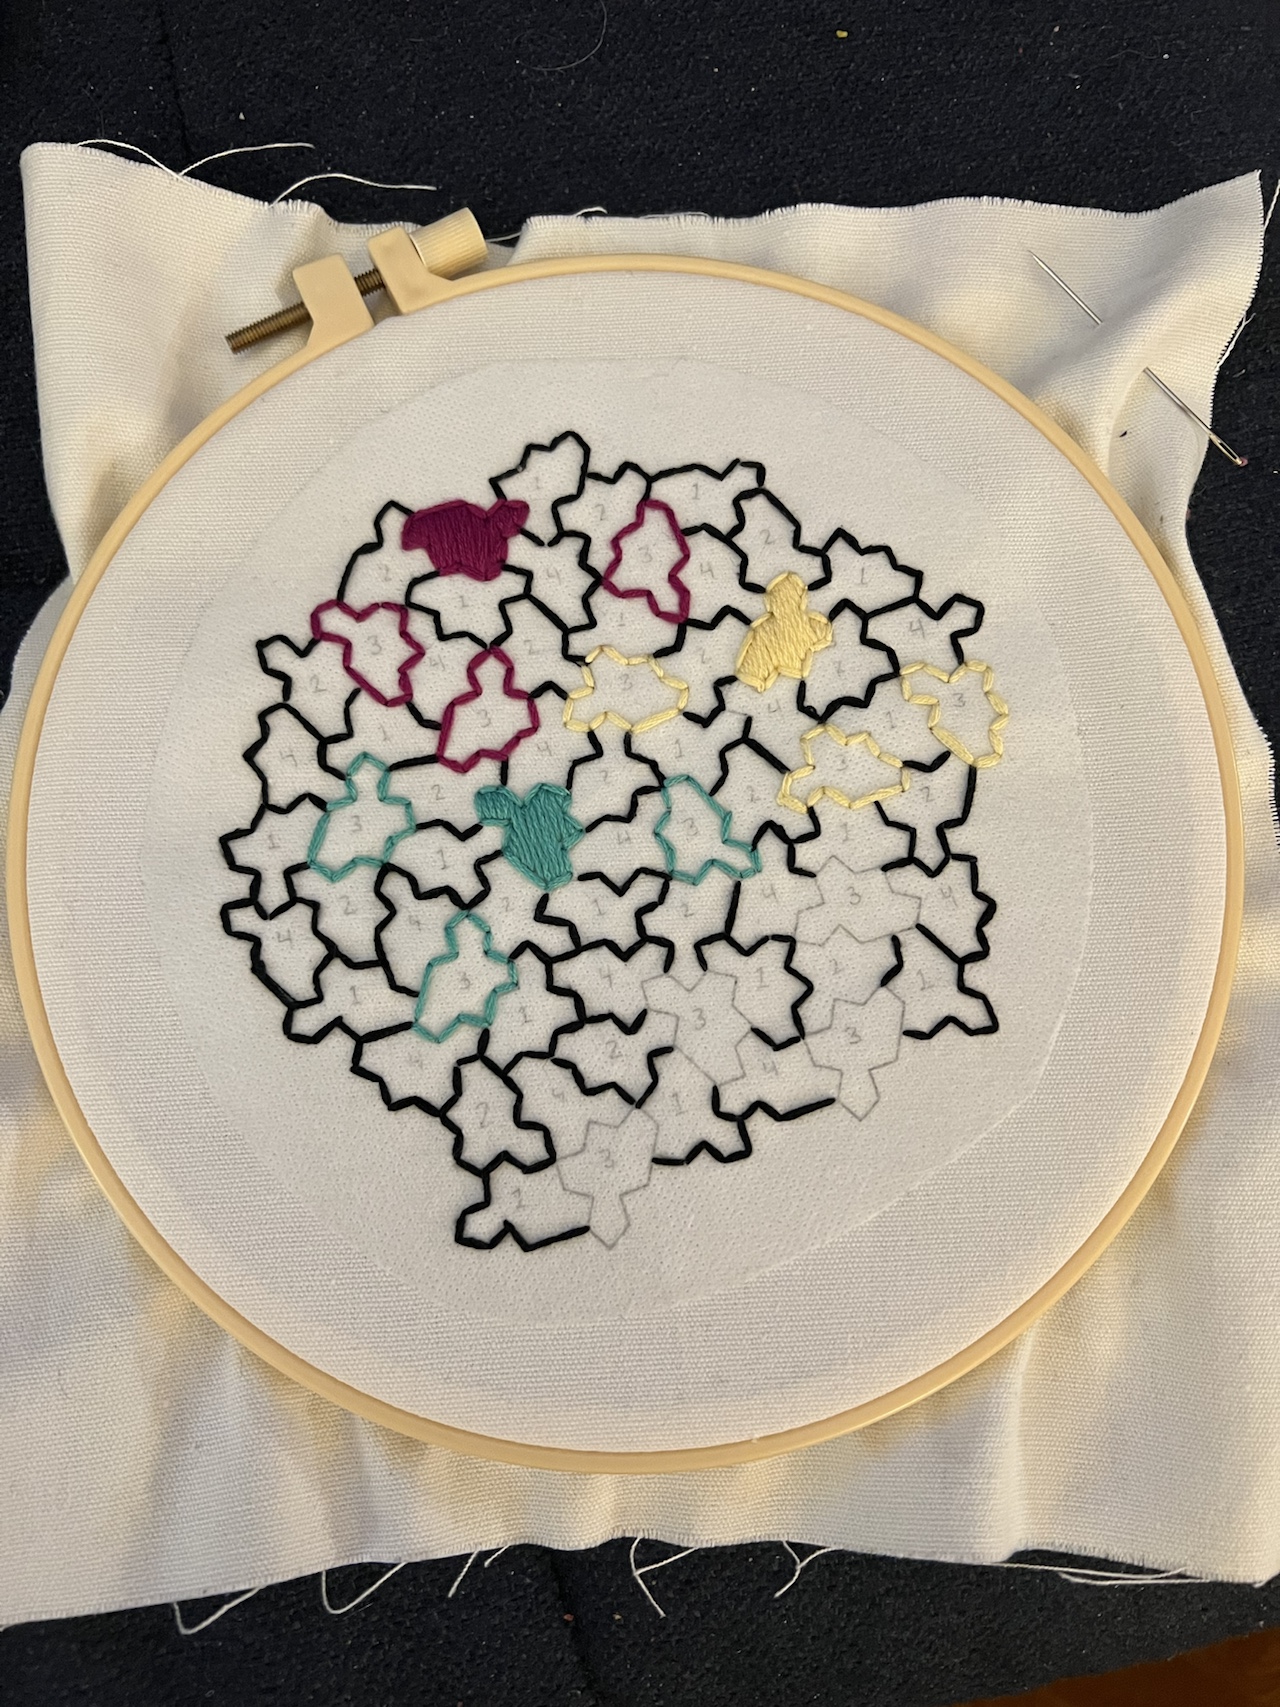
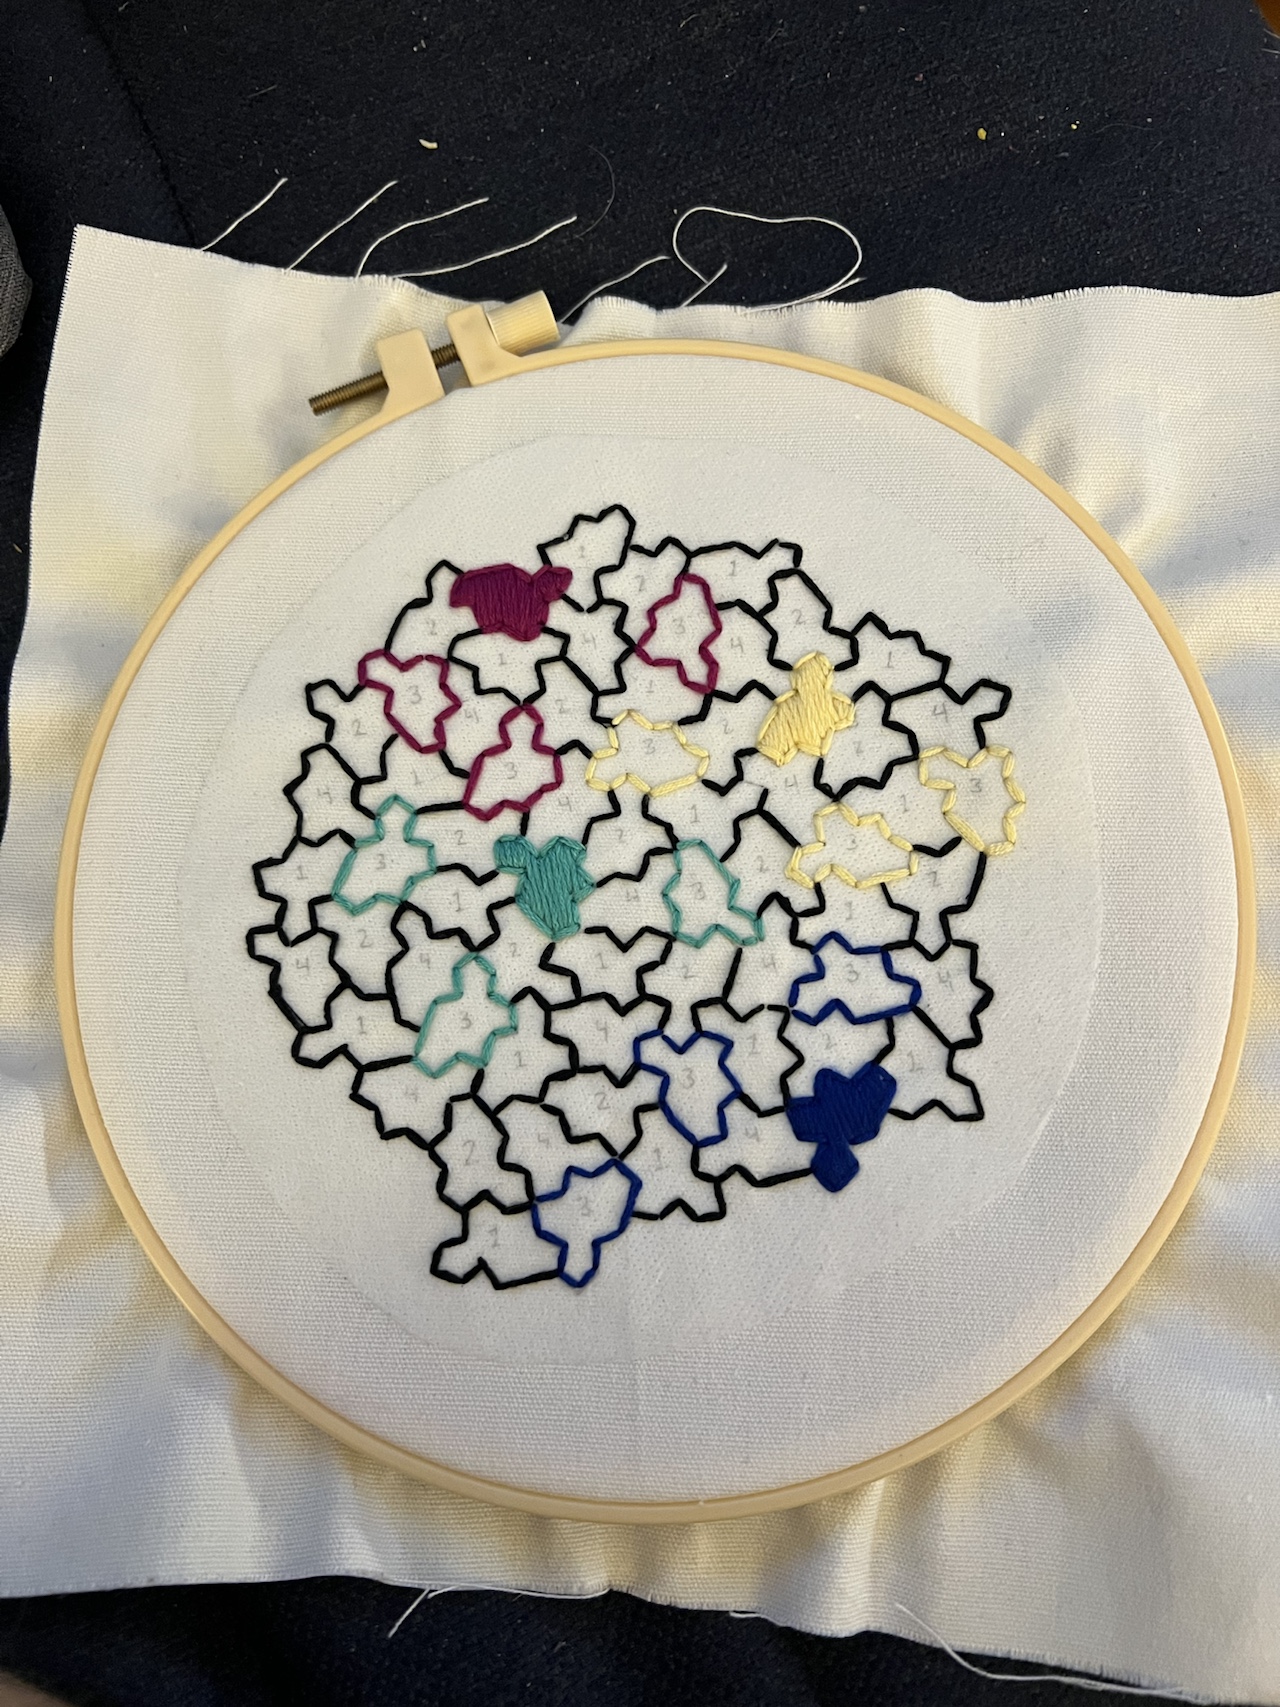
Right now my project is drying so I don’t have a final photo yet. Here it is before I got it wet. (It still has the water-soluble transfer paper on it in the photo.)
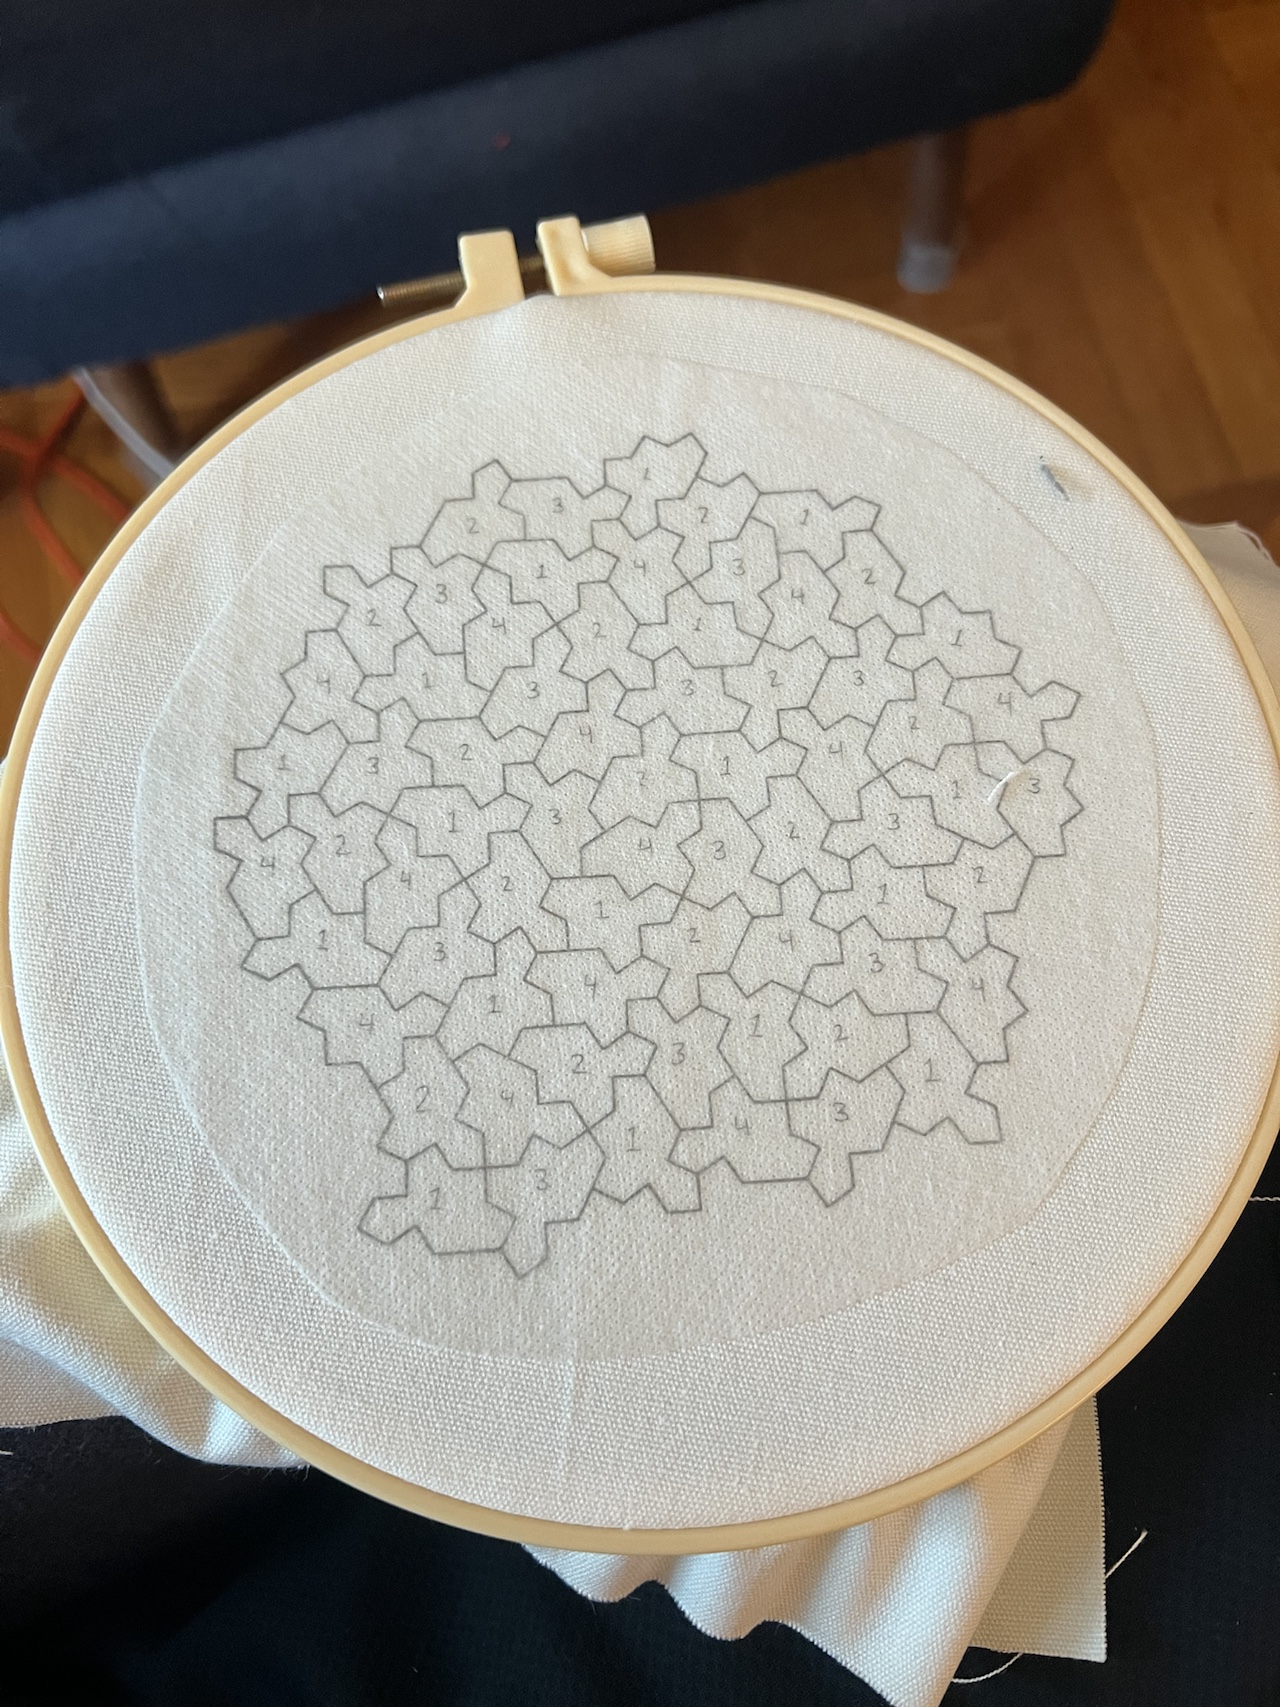
Update: Here’s the photo now that I’ve removed the water soluble transfer paper.
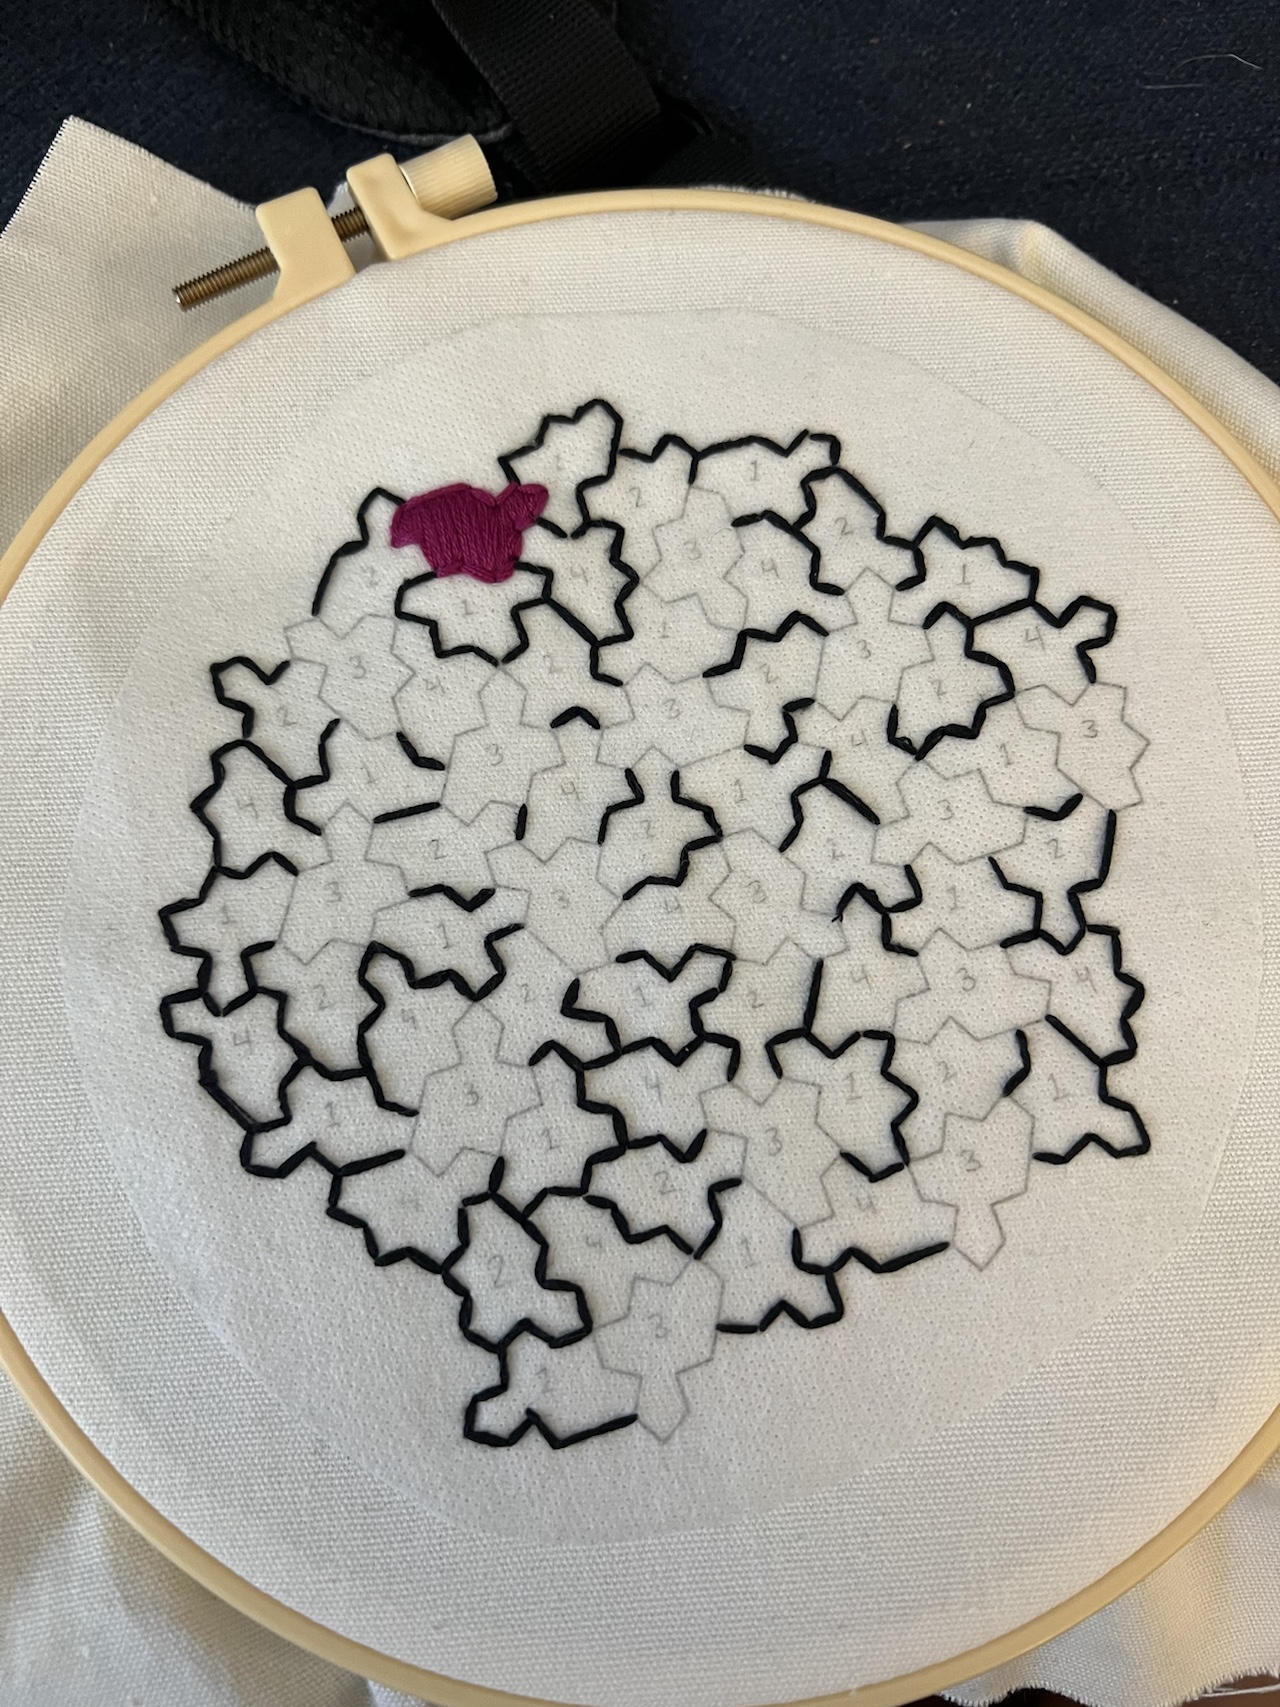
Earlier today I typed “embroidery math” in Google and a site called Threaded Theorems popped up. Nary a second passed before I was on the site. With a website name like that! I saw the instructions for embroidering the aperiodic monotile called the “hat tile.”
Technically what I embroidered uses a slight variant of the “hat tile,” because that tile requires the shape and its reflection when filling the plane, and this variation in the embroidery does not require its reflection. Just a single tile, repeated over and over again, but creating something that fills the plane but doesn’t have translational symmetry! (The variant tile is known as “the spectre.”) And this is modern math! It only was discovered in 2023!
I literally know nothing about embroidery so I’m learning and doing things on the fly. In this project the instructions had me learn the backstitch and satin stitch.
And if you want more technical definition of aperiodic tilings, and some really pretty pictures, here’s the wikipedia page!
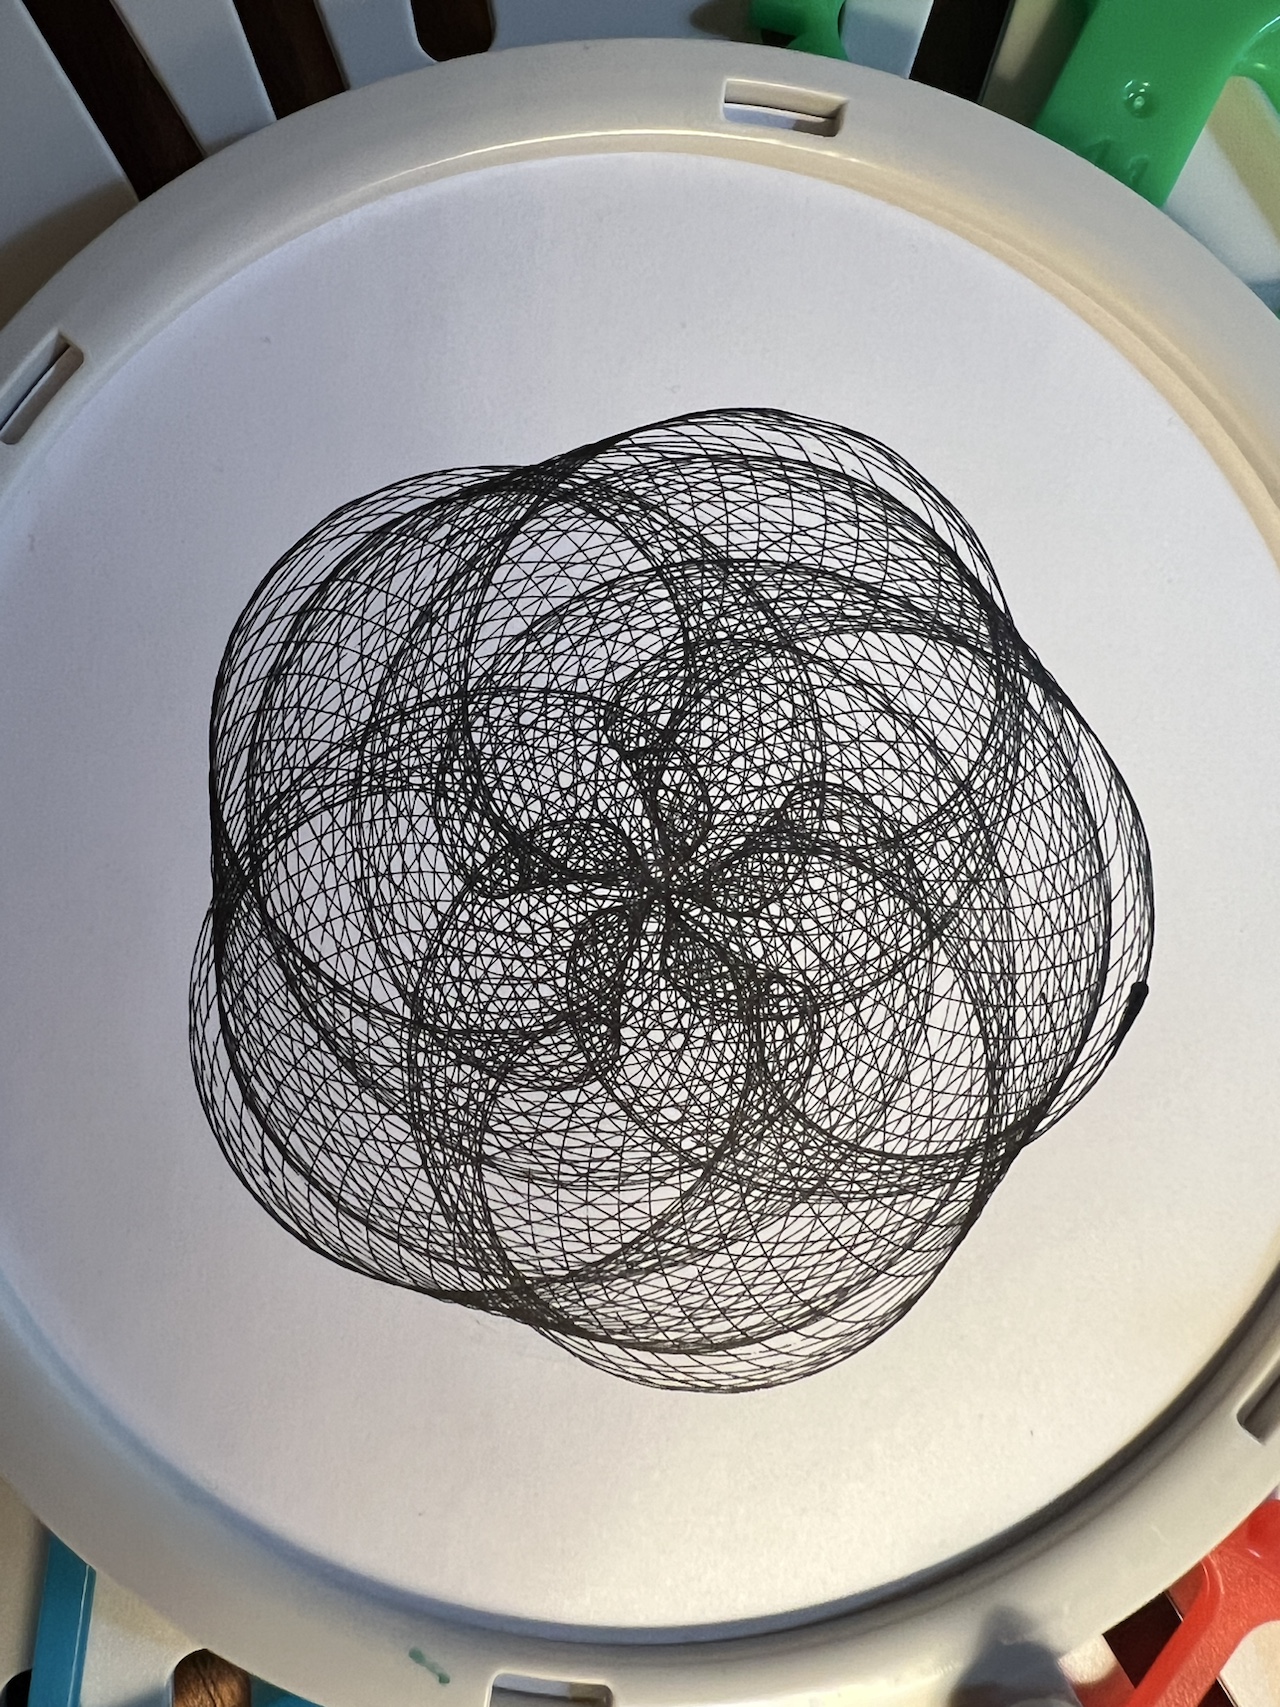
Ages ago, I kickstarted the “hypnograph” which is a cycloid drawing machine.
I tried to get it to work when it arrived, but for some reason, I couldn’t get the drawings to work out. (The instructions that it came with were okay but there were bits that could have been much clearer.) However I found this box in my closet a few days ago, and decided to try again. And it worked!
Here are some drawings I’ve created:
You can see the machine in action in this youtube video [starting at time 4:53]:
Of course I wanted to somehow mathify this. In fact, I’ve never even mathified sprigraph before (though I’ve seen some people derive the equations, but I’ve never tried to do it on my own)! I decided to jump right in and see: can I come up with equations for the final graph, given all the components of the machine?
It was harder than expected, and I had moments of frustration and felt like I wanted to quick. It took me a couple days. I first started doing all this algebra on paper, and realized that was not going to work because the equations got gross. So instead, I went to Desmos and everything became much easier.
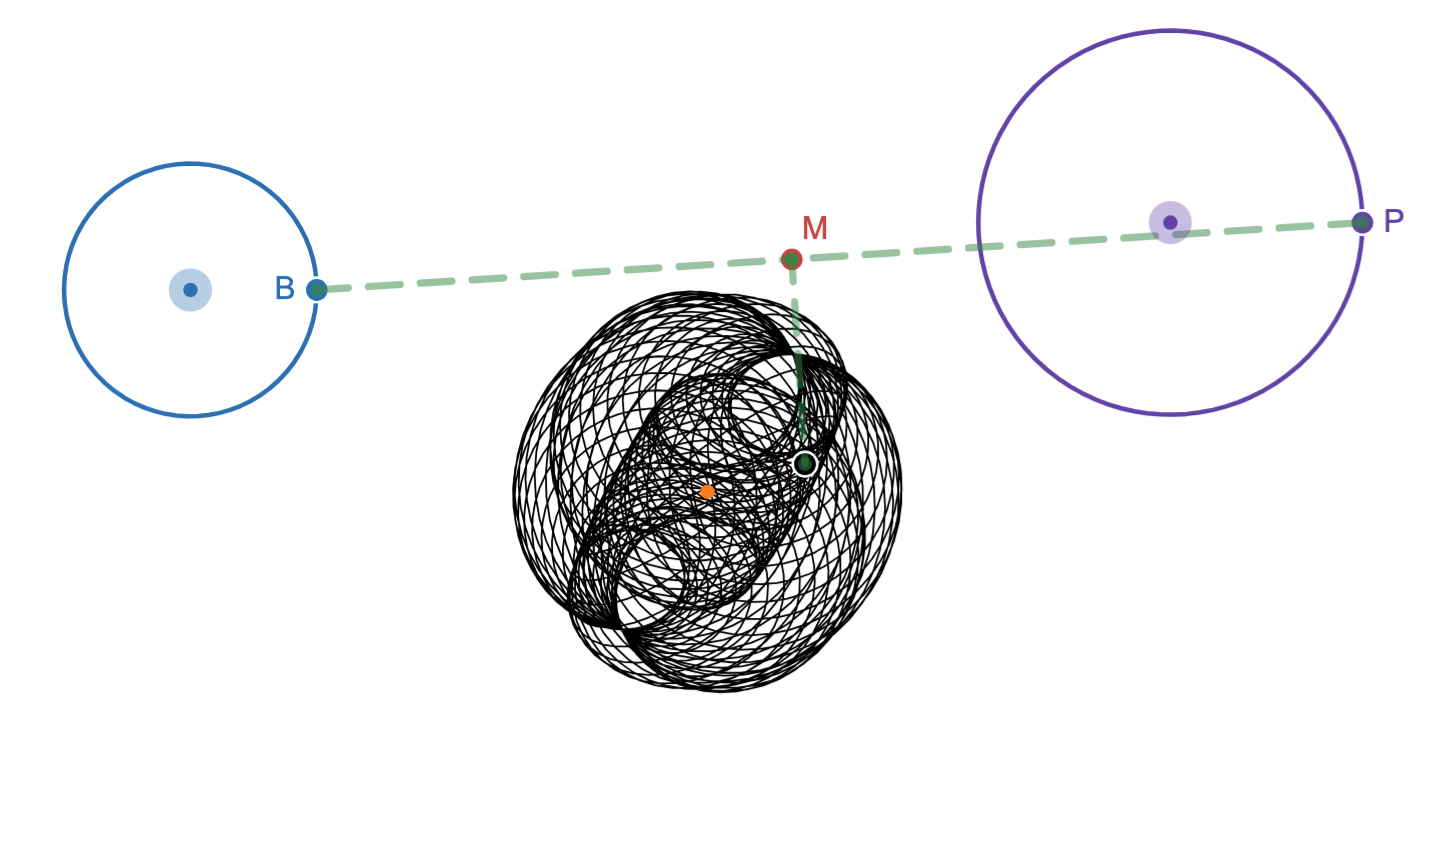
Without going into too many details, here’s my setup in Desmos, and a picture of the hypnograph, so you can see the connections:
I have point B spinning around a circle/gear (and you can change the location, the rate of rotation, and size of the circle/gear), Similarly I have point P spinning around a second circle/gear (with the same things changeable). The arm that connects B and P is fixed at point B, and slides at point P (like with the machine). (I’d watch the video above to see the difference between the fixed point and the sliding point. In that video, the fixed point is on the red gear and the sliding point is on the green gear.)
Initially, I had Desmos plot just the pen location. It was creating some really pretty drawings, but it didn’t mimic what I saw on the hypnograph itself. The hypnograph images always have some sort of symmetry, and my final result didn’t always have that symmetry.
I posted my Desmos and a video of the machine working on Bluesky to see what I was missing. I knew I just needed fresh eyes to show me what I was blind to. And diffgeom clocked it (and dandersod agreed)!
Not sure this is the only issue (and have not checked your model), but the paper is rotating relative to the table (and therefore relative to the rods holding the pen), while on your screen it appears not to be…?
YEESH! I forgot to have the paper rotate as the pen was drawing! ACK! But thinking about that hurt my brain. I came up with one solution, and tried to implement it, and that failed. But with some perseverance, I came up with a solution and I think it works! [1]
Here’s an image from my Desmos sheet to show you what it produced:
And if you want to play with the Desmos sheet, change the gear sizes, the length of the two arms, and the speed of the gears and rotating paper to see the various results, here you go! Click on the random image below I made in Canva, and press play. It’ll look like garbage at first as it’s drawing and then suddenly you’ll see how cool it looks!
Now I should qualify to say I’m not 100% sure this is perfectly correct. But I wanted to share what I had because I’m proud of it. And it was fun! And if I don’t write it down, I’ll never have a record of working on this project!
Archiving for later: These youtube videos [one, two] are great for getting a sense of the machine and how to modify it so it works the best.
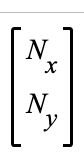
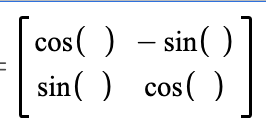
[1] A bit of an aside/archive that won’t make sense to anyone not in my head: Essentially I realized I was doing a hack for polar coordinates but not allowing r to be 0. So it was graphing the right equations but having all negative r graph as positive r. When I realized that, I finally figured out what I needed to do. I made the center of the spinning paper (0,0). That had to be fixed. Then I had the coordinates for the pen. So I put those coordinates through a rotation.
The pen location was at this point:
So to make the equivalent marking on a moving paper, I multiplied it by the rotation matrix (where the rotation matrix was filled with values that had the wheel rotate at a certain rate):
Which got me the pen location after it had been rotated! In my Desmos page, that turns out to be:
Honestly I was really proud of this solution! And what I love about all this work is it incorporates all the stuffI teach in precalculus… polar coordinates and rotation matrices FTW! We stopped teaching much about vectors, but I used a bunch of vector thinking in this also!
I’m going to be teaching a mini-course (7 days) on math-art in this upcoming school year. In my work on that course this summer, I started thinking about how I can have kids work with embroidery hoops and floss. And unrelated, this morning, I was thinking about a quilt my high school friend made for me and gave me yesterday. What a special gift from a truly special friend!
When thinking about the quilt, I started thinking about Truchet tiles and how those could create some beautiful patterns for quilts. And then the pictures of Truchet tiles reminded me of a series of posts that come on my feed regularly by the Hitomezashi Bot on Bluesky, created by Alien_Sunset.
So I went to that bot, which led me to the creator’s website (which is here), and finally I found the Hitomezashi page here. That page led me to this Numberphile video with Ayilean (a creator who I adore):
A method of specifying hitomezashi designs in shorthand form using binary strings was employed by the first author when she proposed an activity for the Math Art Challenge organized by Annie Perkins (Perkins, Citation2020). The premise of the Challenge was to provide, each day for 100 days, an activity which could be done during lockdown or remote learning with materials on hand. Hence it was suggested that hitomezashi designs could be drawn on graph paper, if sewing materials were not available; some participants chose to render them using their preferred software. Three ways to choose the binary strings were suggested: to intentionally create regular patterns by repetition (which we explore in this paper), by flipping a coin (thus making aleotoric art) or as a form of steganography (e.g. by using the ascii representation of letters).
The Math Art Challenge hitomezashi activity created a lot of interest on Twitter; subsequently, a Numberphile video featuring Ayliean MacDonald took the drawing idea to an even wider audience and explored the steganographic and aleotoric aspects (Haran, Citation2021). This video came to the attention of Defant and Kravitz (Citation2022), who have subsequently proved a number of results about arbitrary hitomezashi designs…
And FULL CIRCLE! When I got here, my heart was twitterpated because the authors talked about Annie Perkins and her 100 Day math-art challenge. I KNOW ANNIE! And I love Annie’s work so much! And so I found her math-art challenge from Day 14.
Just from googling “hitomezashi math” there are a ton of hits. I love seeing how the simple setup of the hitomezashi activity can lead to some really interesting patterns, observations, and questions/conjectures.
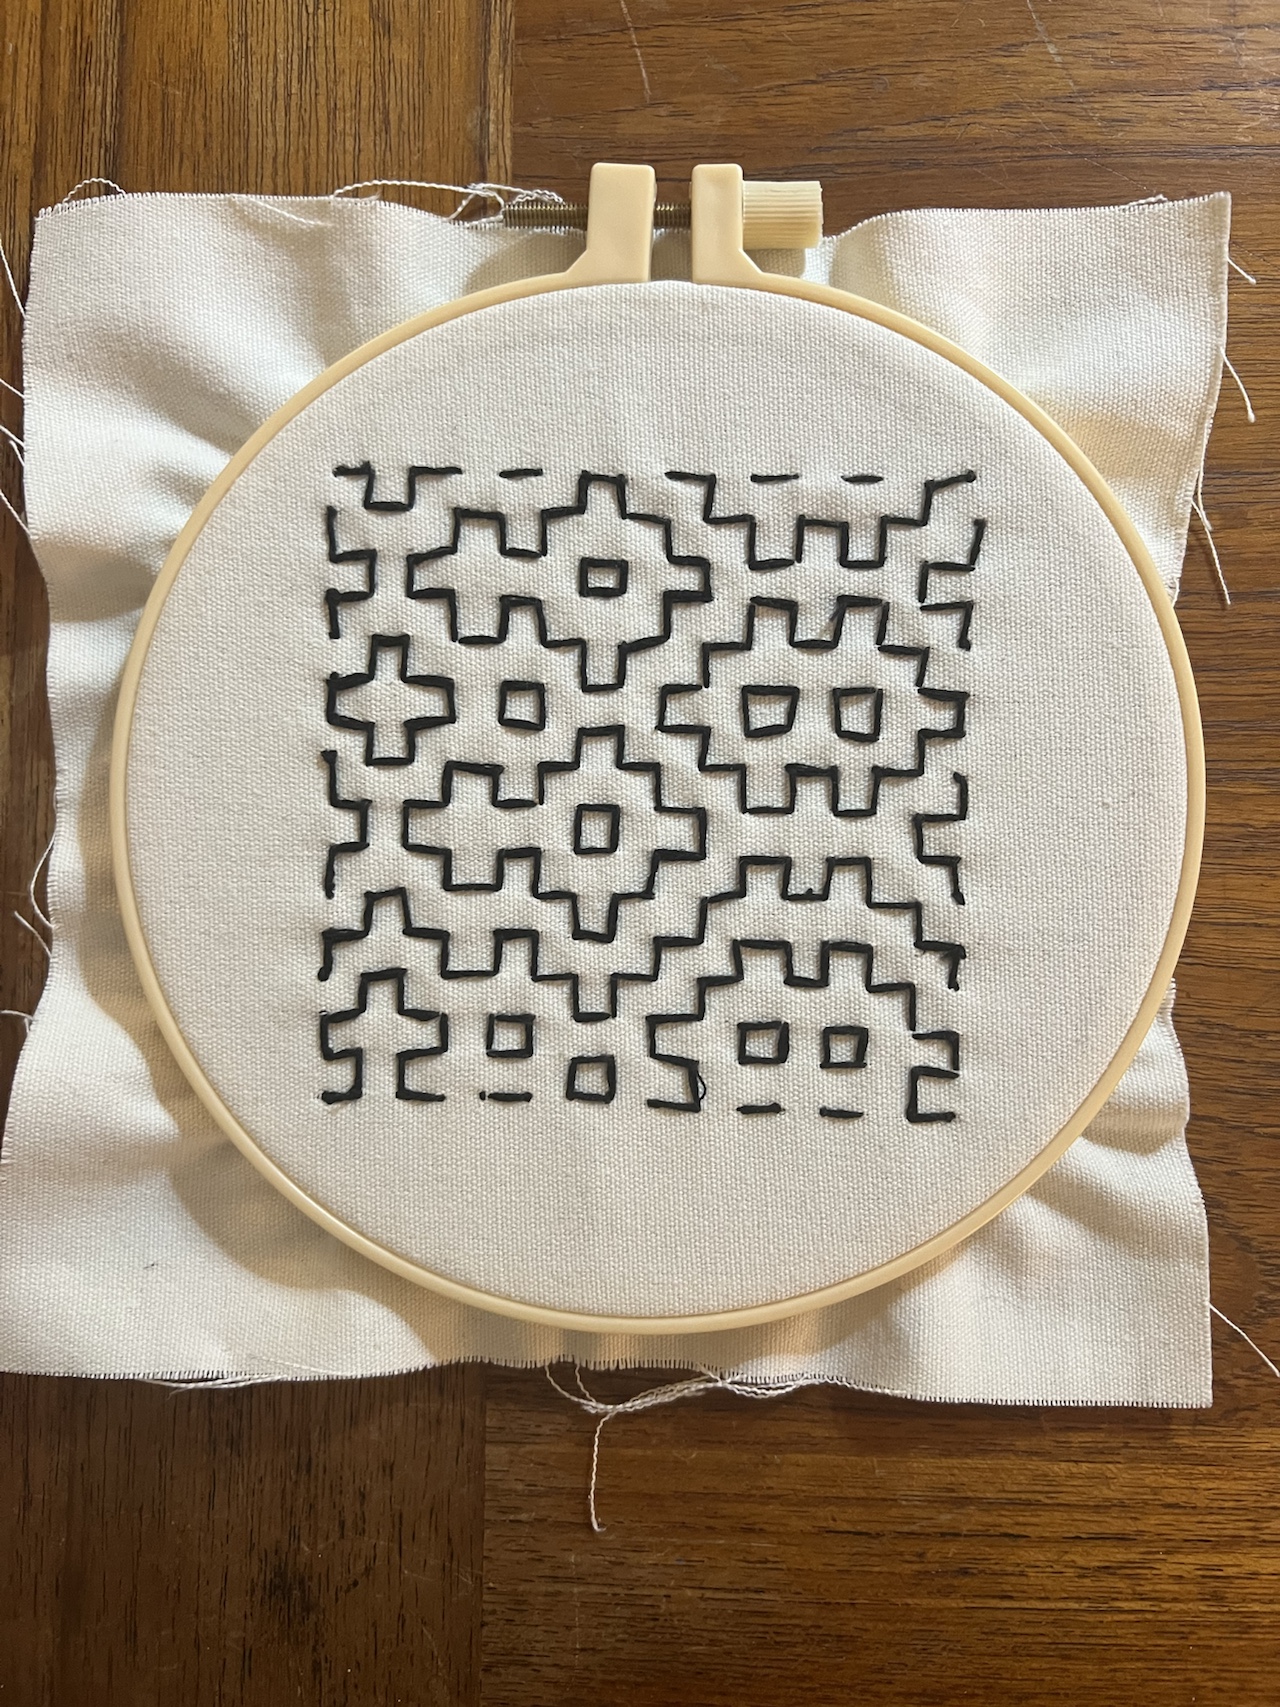
So what did I do? I HAD TO MAKE ONE MYSELF!
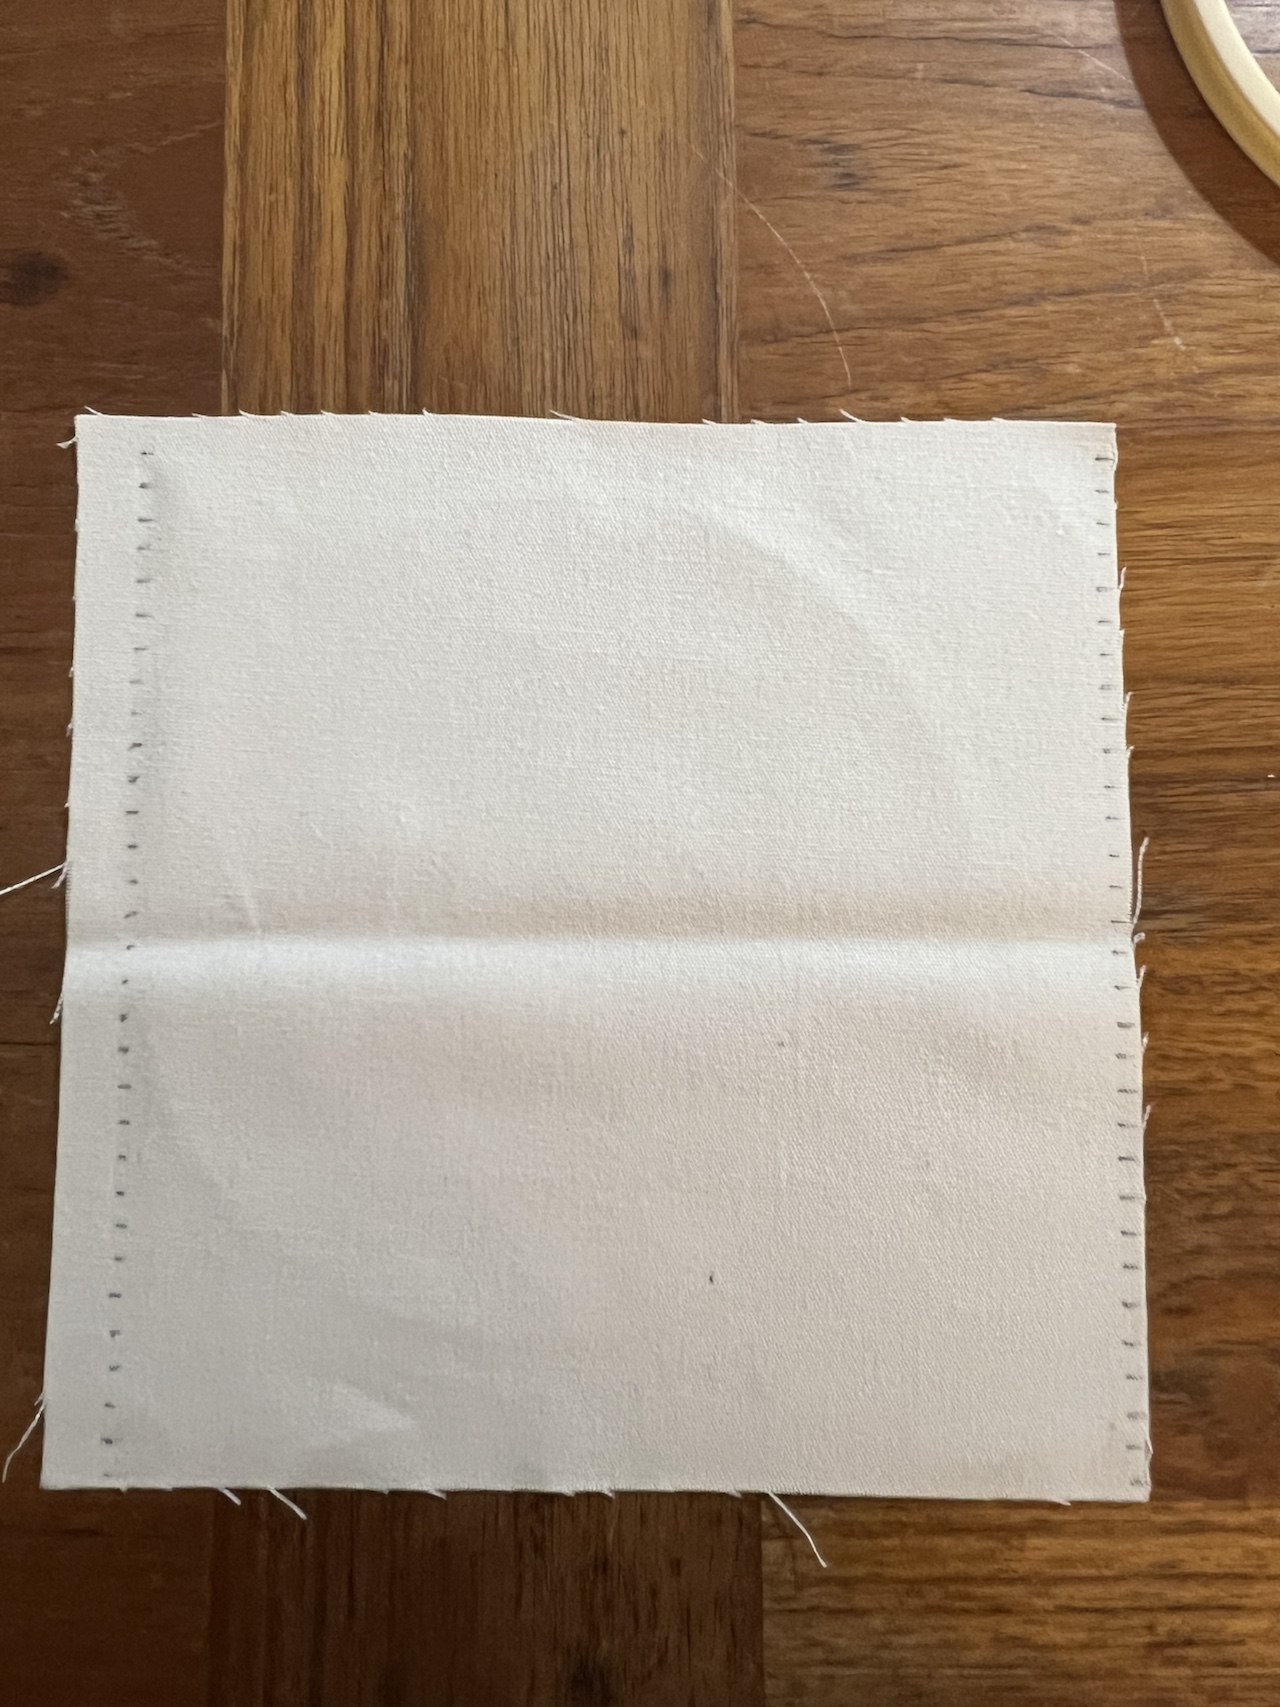
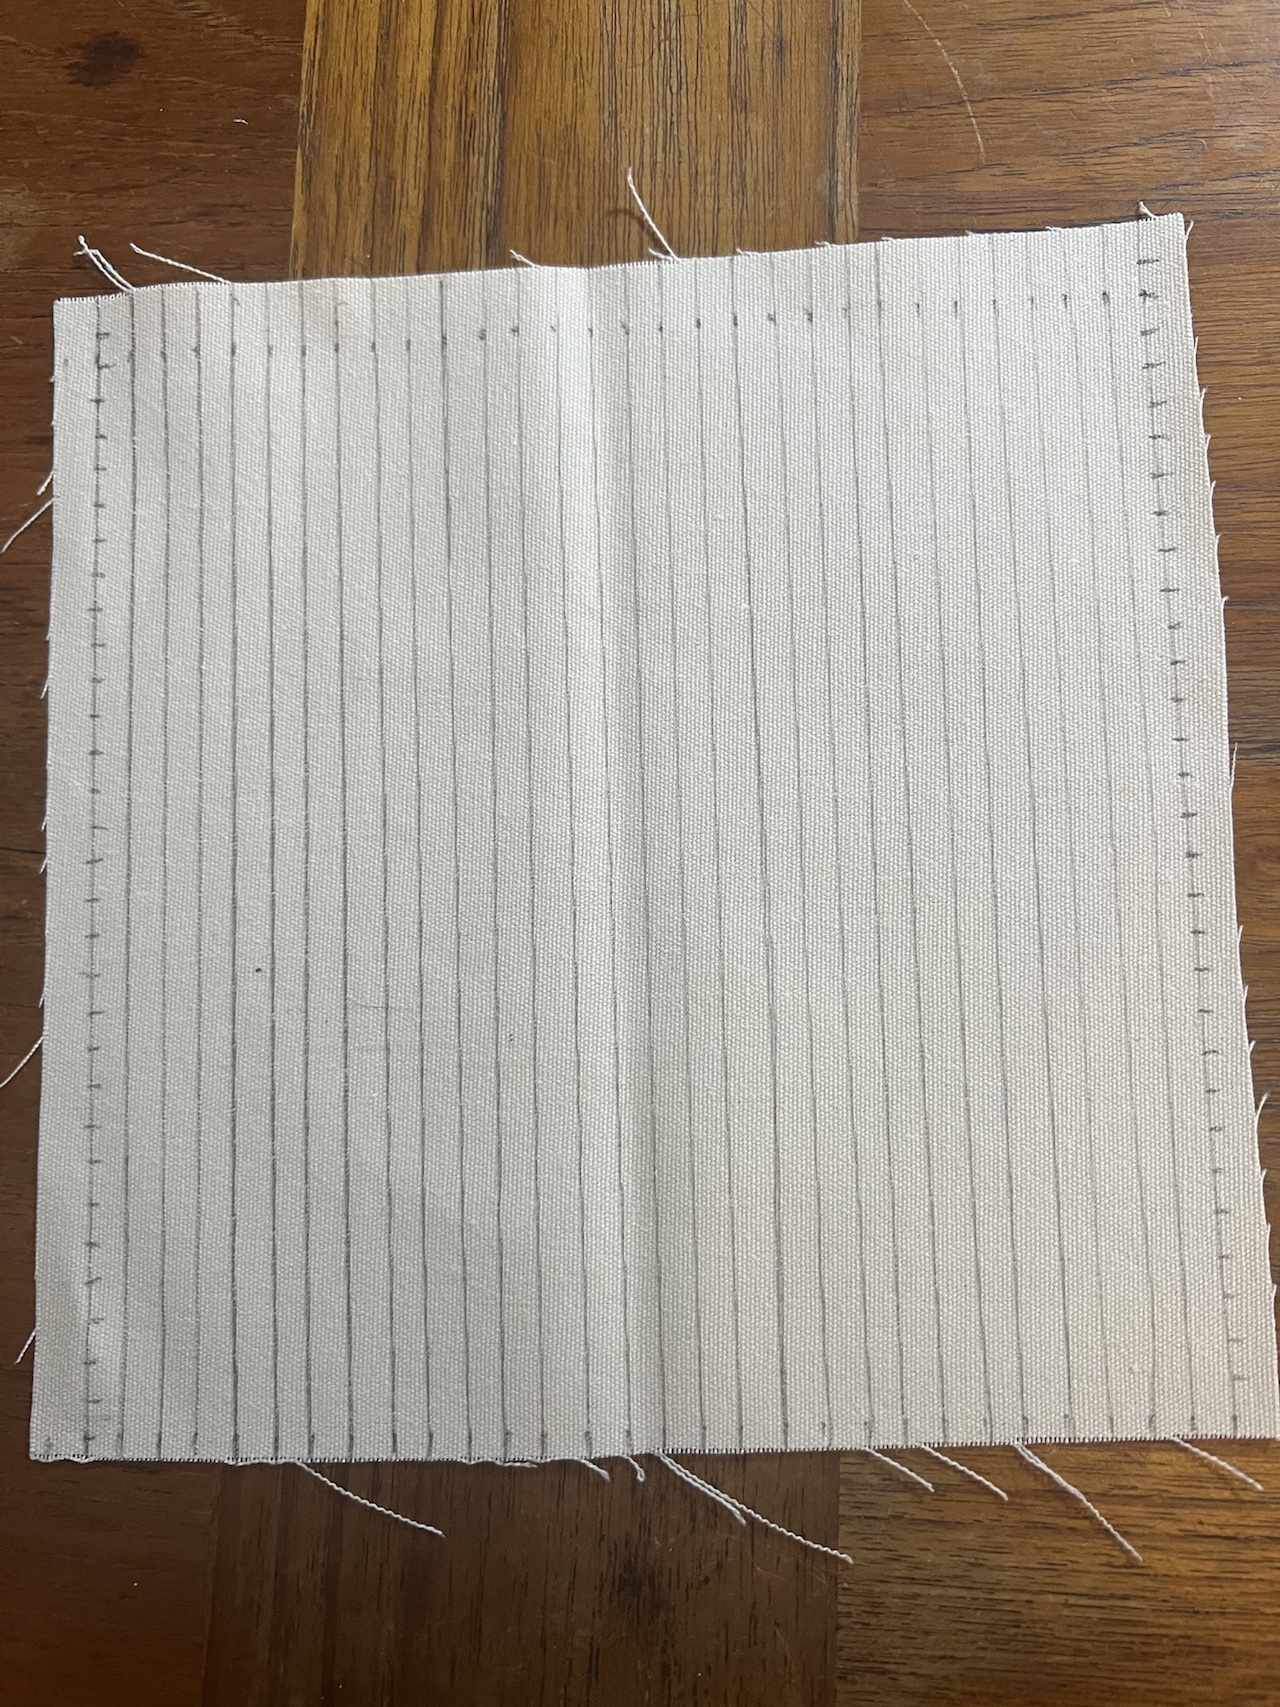
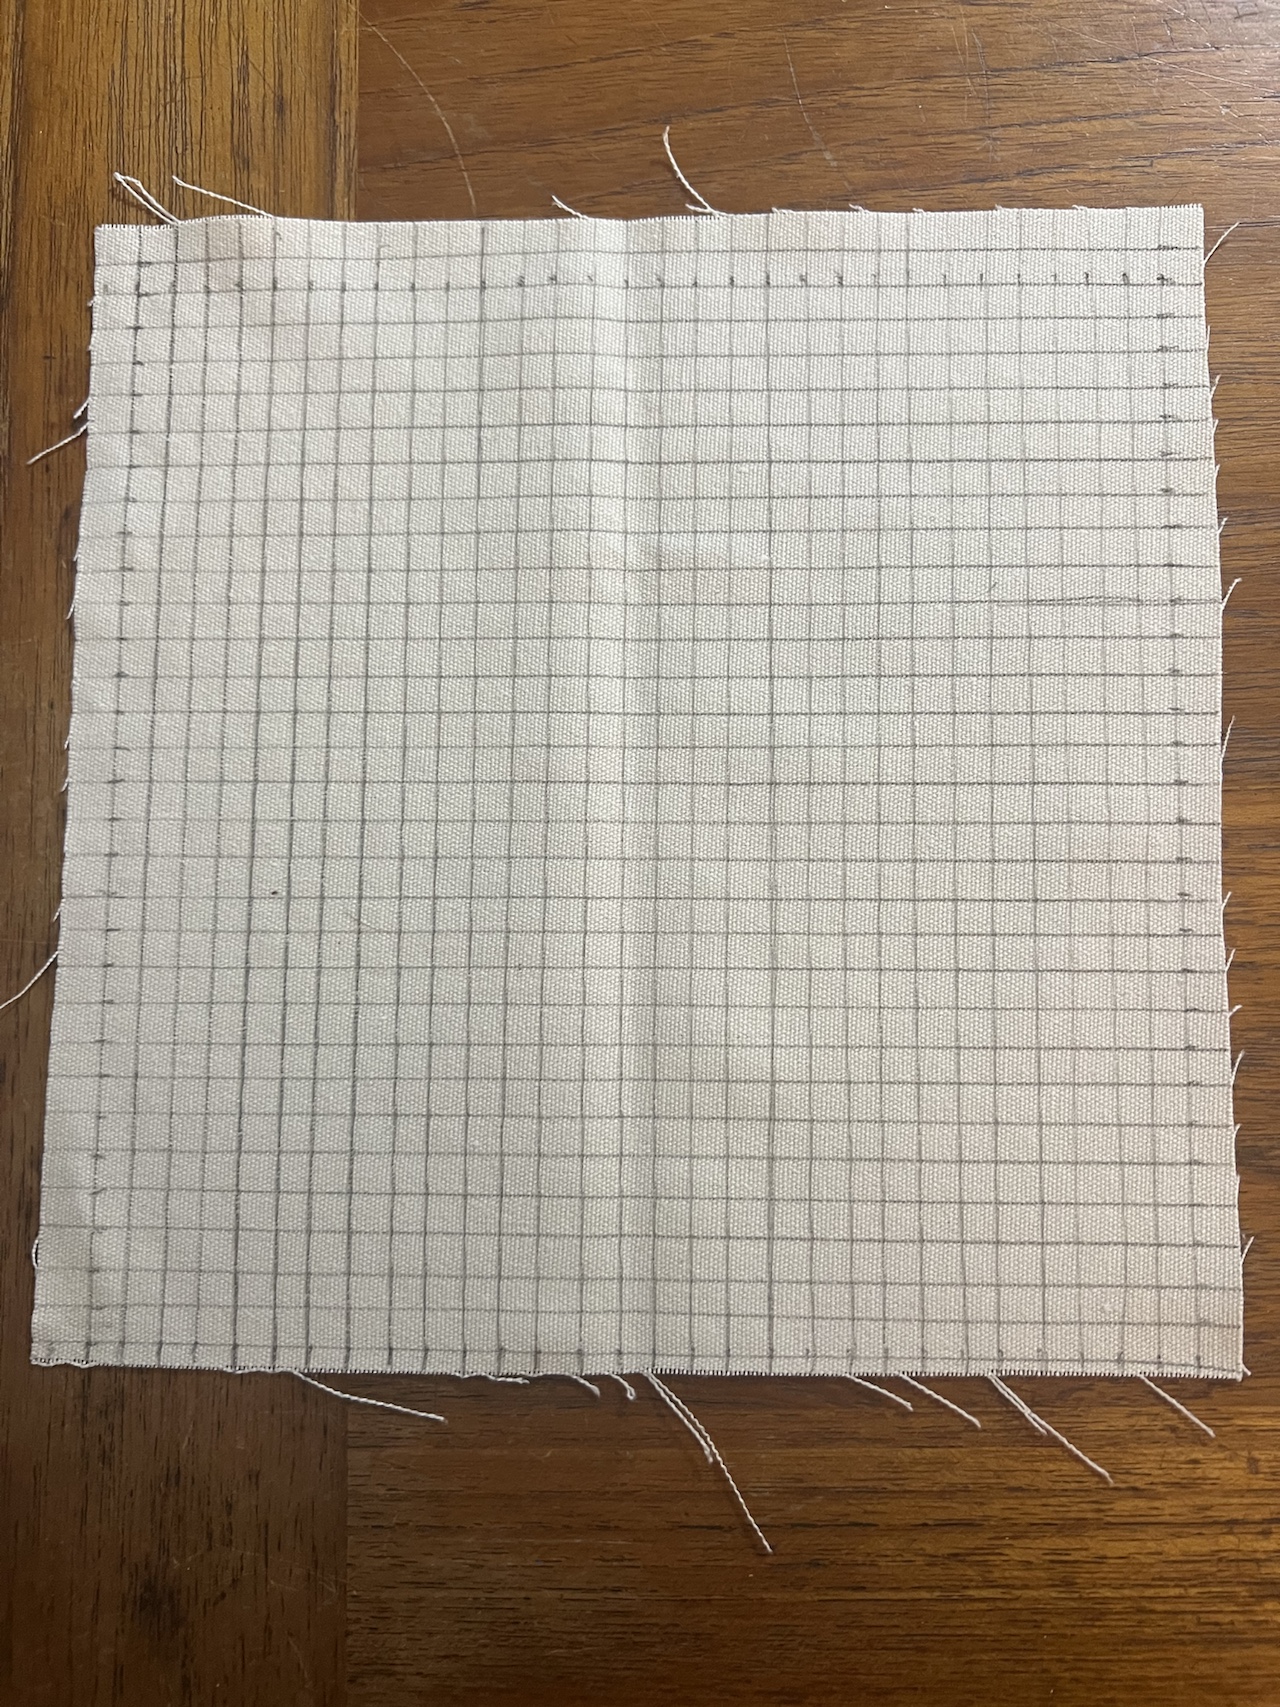
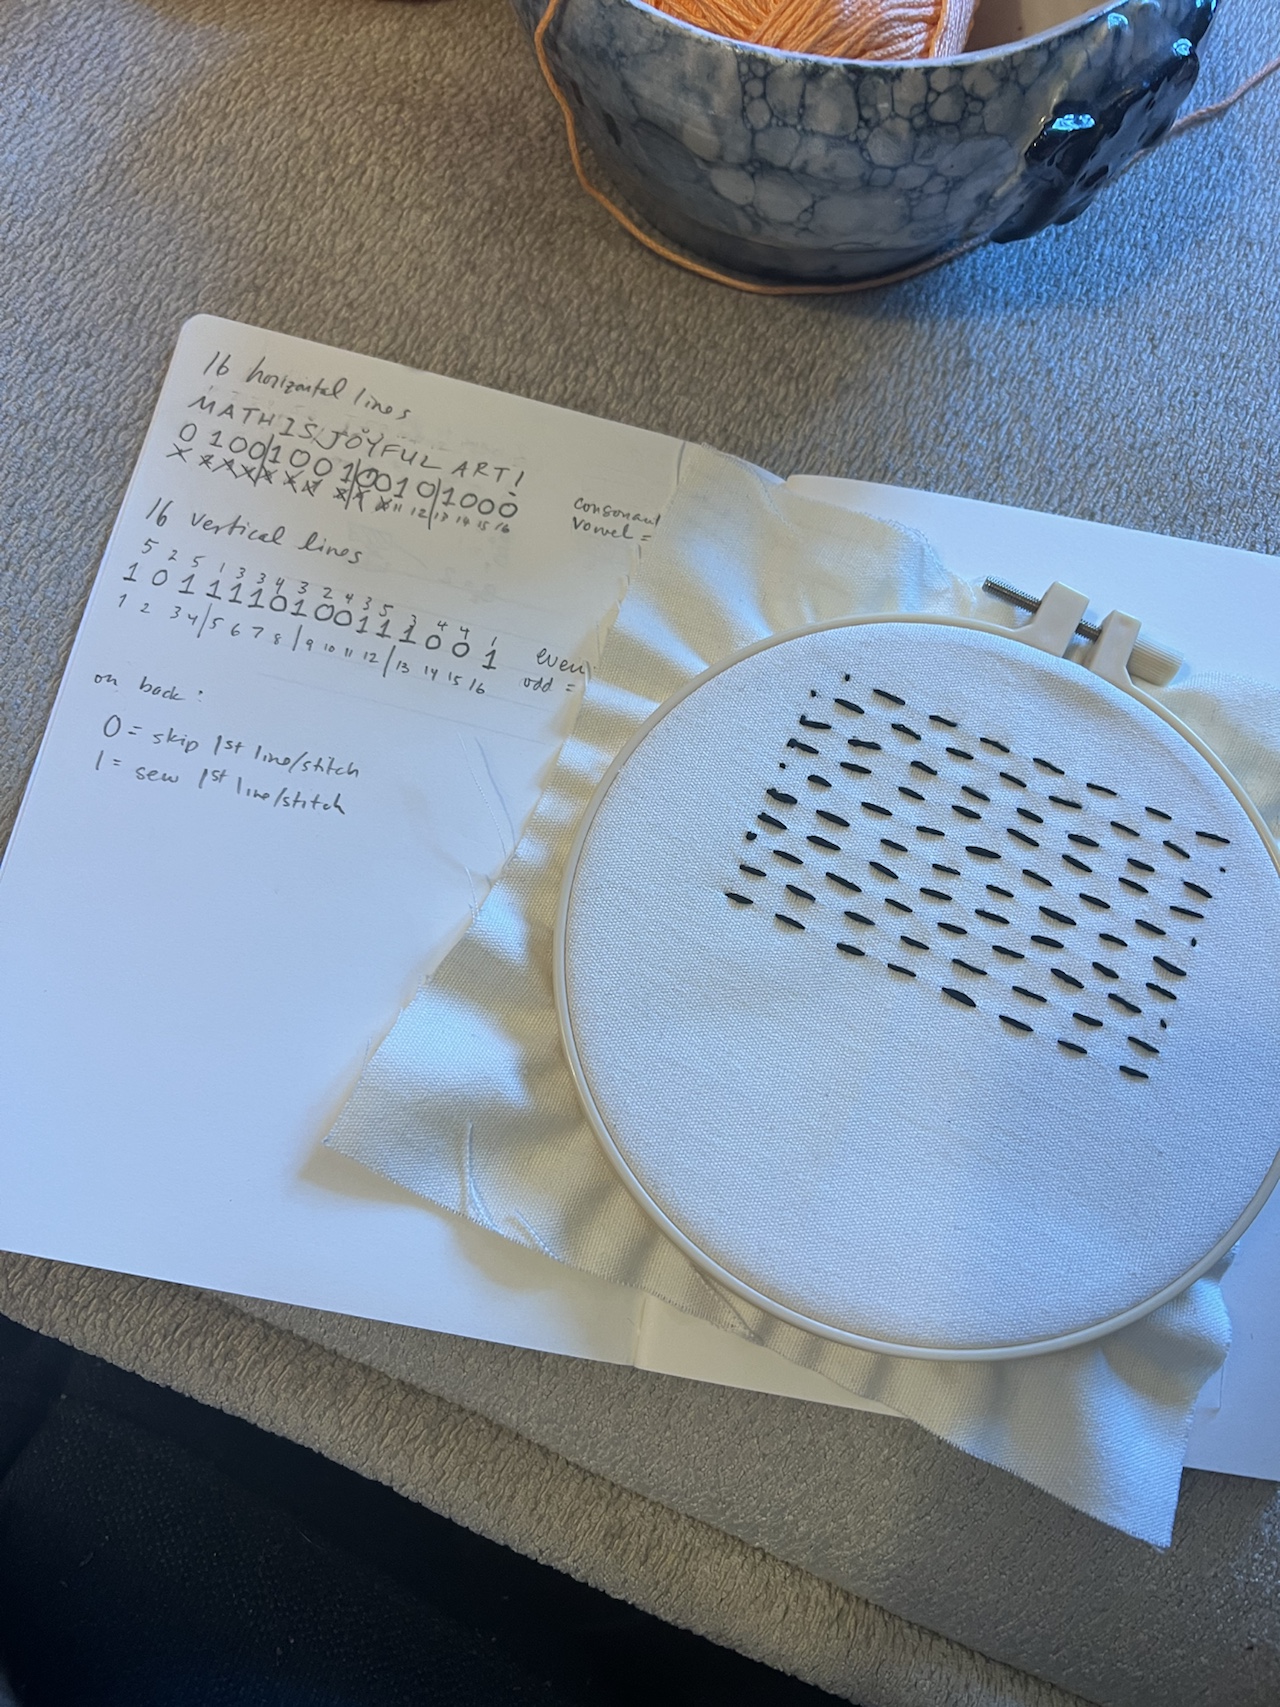
I made 16 horizontal lines, and 16 vertical lines, on my linen — just using a ruler and pencil.
To decide the way I would stitch the horizontal lines, I chose to do what Ayilean did in her Numberphile video and encode a phrase: MATHISJOYFULART! 0100100100101000 [every consonent is a 0, every vowel is a 1]
And then I had to sew! I was basically figuring this out on the fly. How to tie knots, how to end a row of stitches, how to efficiently thread the needle, how to avoid knots. And I knew I wanted the back of the embroidering to look nice too!
And then we get to the end! The final product!
Clearly I’m not amazing at making my stitches yet. And I think I might want to use a thicker floss or even some cotton yarn next time. I saw some patterns made with light string on dark cloth, and I think those looked beuatiful too. But I’m really proud of how I just decided “hey, can I do this? I think I can!” and just made it happen!
From thinking about quilts to Truchet tiles to hitomezashi, my mathematical life today was very full.
A Hitomezashi generator where you can enter binary strings: https://www.forresto.com/sashiko [I like this because then you can see what the front and back are by changing the strings to their dual]
A friend found this Sangaku, which if you don’t know (from Wikipedia) are Japanese geometrical problems or theorems on wooden tablets which were placed as offerings at Shinto shrines or Buddhist temples during the Edo period by members of all social classes.
The question that I’m attempting to figure out is: what is the radius of the small circle in relation to the length of the side of the square? And you’ll see from the text she sent me, there is the answer.
We found the puzzle curious and we thought the figure was lovely, so we decided to make a piece of stained glass math-art for it. (We’re trying to teach ourselves how to make math-based stained glass art. As you can see from the picture below, we’re still very much novices!)
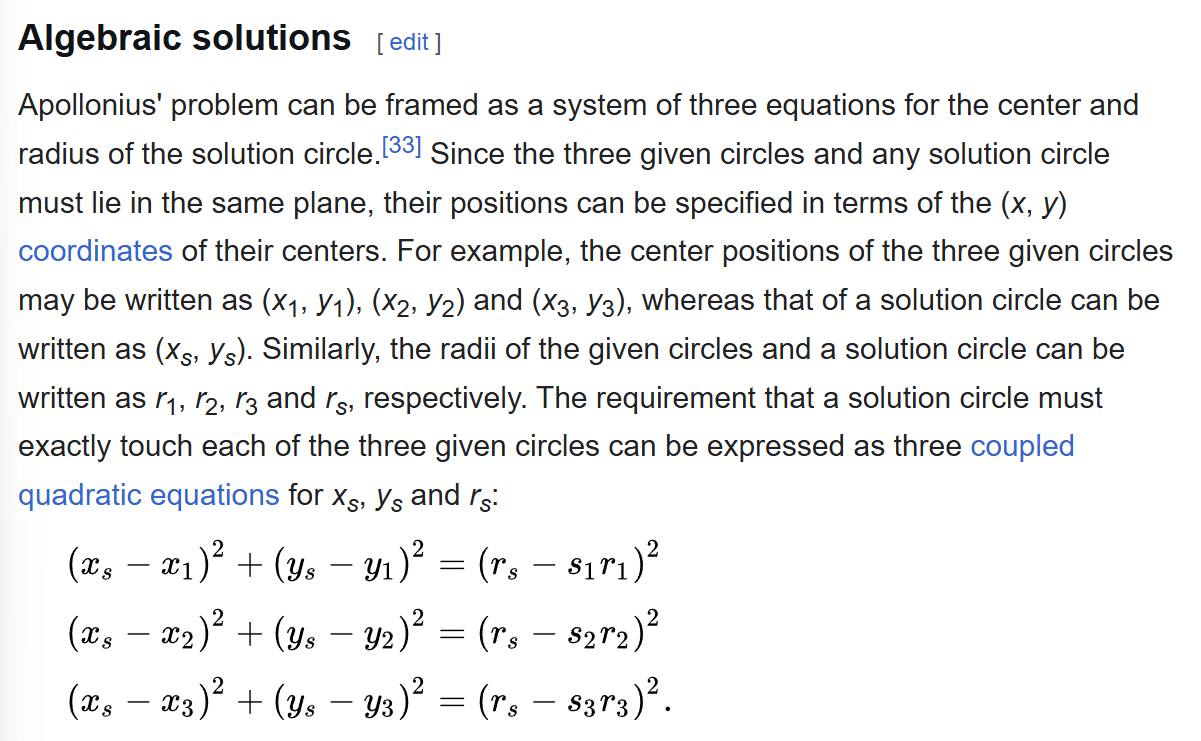
I spent over an hour on the problem this morning. I played on Geogebra to get the contours of the problem itself to help me understand the constraints. And then since I didn’t have a better approach, I started brute forcing it. I came up with equations when I put everything on the coordinate plane (using calculus to find slopes!), found some tangent lines, and looked for intersection points of these lines. I knew it wasn’t efficient, but I thought it would at least help me see how things would shake out I was hoping lots of terms would drop away…
Alas! The algebra got messy, and then I thought I’d have a system of equations that could be solved.
To be frank, I’m pretty sure in the mess of algebra, these equations are probably not correct. And I couldn’t really solve them anyway. (If you’re wondering what a, b, and c are, they stand in for slopes of the three lines (pink, light blue, green).
I’m officially annoyed and ready to give up. At least for now, or for a few days, or maybe forever. BUT the reason I’m posting this is that I’d really love a solution. Why is the radius of the circle 4/33s (where s is the side length of the square)? What is the approach to figuring this out?
UPDATE: I posted about this online and here are some of the assists I’ve gotten. I was going to look at them today but I’m not feeling super well.
From Facebook: Bowen: “Check out Descartes’ Circle Theorem…” [here] From Jason: “I am sitting across from Bowen this morning and UNBEKNOWNST TO ME, you sniped us both in parallel. Unbelievable. I solved it on paper, got all excited, and then saw that Bowen– SITTING ACROSS FROM ME– has already supplies that link above. Anyway, I’m not going to let him Liebniz my Newton here. I did some work on paper independent of him and will publish it with pictures in the comments below.
I mean, I did not write the work in a way that was designed for other people to write, so there are a LOT of “S” letters that might either stand for “the numerical length of the side” or “the name of the solution circle”, depending on context.”
From BlueSky:
From diffgeom: If we invert the plane ((r,θ) -> (1/r,θ)) about the point where the three large circles meet, each maps to a coordinate line; the small circle maps to a circle whose center and radius look easy to find, and inverting again should give the radius? Will give this a try…
I replied: Omg- my brain!!! Wow! I don’t know if I’ve ever inverted the plane and I didn’t even think to look at this problem through polar. I’m so intrigued!!! Essentially you’re saying the diagram will look easier once we do the inversion, we find the answer in the inverted world, then put it back?
[At this point, I looked up and watched this amazing 27-minute Numberphile video that explains some of the basics of inversion and got me excited: https://www.youtube.com/watch?v=sG_6nlMZ8f4]
tcorica replied: So, I’ve captured everything in a Desmos sheet EXCEPT how to take the final circle and un-invert it to find the uninverted center and radius. Any hints? I’m avoiding “reading up” on inversion, but I will if needed!
P.S. I flipped the image across the horizontal so that the given circles had centered on an axis, making it easier to write the polar equations in terms of r. @samjshah.bsky.social
tcorica also shared: I saw the responses suggesting “inversion” – i.e. recasting the problem by writing equations r= and then rewriting them as r’=1/r=. I’ve still managed to avoid looking inversion up 🙂, but I’ve done some thinking and experimenting with it – it’s a surprising and cool technique. I’ve found a reasonably nice solution to this using inversion. Because the answer is a weird looking fraction, I’m wondering if perhaps there actually isn’t a pretty geometric solution to this pretty problem! As an introductory exercise, I found it useful to consider the problem of finding the intersection of the circle with radius P and center at (P,0) with the circle of radius Q and center at (0,Q). E.g., show that the POI lies on y=(P/Q)x. Tons of approaches possible, inversion being one. 3/3
diffgeom replied: My approach: A circle of radius r at distance R from the center of inversion has points at distance R±r on a ray; inverting in the unit circle gives points at distance 1/(R±r), so the radius is (1/2)(1/(R-r)-1/(R+r)), or r/(R^2-r^2). (IIRC, the distance to the center is half the sum, R/(R^2-r^2).)
nsato7 also commented after diffgeom:
As @diffgeom.bsky.social points out, inversion takes care of the problem nicely. (And many of these Sangaku problems were solved by inversion.)
The three arcs invert to three lines. There are two circles that are tangent to these three lines; we want the “top” one.
mqb2766 shared: Similar to the other posts, a modern version of this problem is gps/trilateration with the distances from the known centers being 2-r and 1+/-r so 3 quadratics in 3 unknowns – the center and the radius. You get a trivial solution of r=0 as well as the stated one.
noswald also shared (unrelated to the others): My inelegant solution would be to impose a coordinate system on the figure and set up three equations involving the coordinates of the inscribed circle and its radius. We know the distance from the center of the circle to a corner is s-r, to one side’s midpoint is s/2-r, and to another side is s/2+r
From Email
My friend Japheth W sent me his written work, which he said I could archive here, noting “It’s not quite publication ready, but probably understandable to math teachers who are experts at reading even more disorganized student work.”